INCREDIBLE HORIZONS 
STEAM babies Toddlers prechool school aged Physics 

FabulousPhysicsFun

Easy Car Ramps Link
Young children learn about physical properties in their environment by acting on objects, materially and mentally, and by observing the reactions of objects (Kamii and Lee-Katz, 1982). `Physics activities stimulate children's inquiry and problem-solving skills. While young children cannot define physics, they can make discoveries about matter and energy. For instance, activities with balls and ramps offer children experiences with their physical world, upon which they can later build more abstract physics knowledge (Woodard and Davitt, 1987). Through such manipulation, children learn how their movements affect the movement of other objects in different ways (Woodard and Davitt, 1987).

Science experiences that include sensory activities are particularly beneficial for infants. Using nature as a laboratory, you can freely:
  1. Explore and stimulate their senses and learning

  2. Model how to observe science in our world

  3. Record experiences with photographs or videos

  4. Collect samples together

  5. Process your samples in different ways with your baby/child

  6. Learn how to preserve or protect your samples together

  7. Model how to use all your senses to examine your samples up close

  8. Sort, compare, and organize your samples together

  9. Have fun with your samples while learning what excites and stimulates learning for your child

  10. Discover ways to share your interests with your baby

One of the best ways to explore the world with your child is to use their curiosity and interest levels as a guide as to what to focus on.

Nurture THEIR natural curiosity as it maximizes and enriches their experiences and stimulates and excites their senses. Instead of directing them to look at what you think is interesting all the time, take the time to watch them and find out what they think is interesting. Children enjoy and remember experiences better when they get a chance to observe and follow their own curiosity.

Once something catches your child’s interest,
start asking them questions.

“Oh, that is a cool rock/stick/leaf/whatever. What color is it? How big is it? What do you think that spot is? How does it feel?”

Get them thinking about what they see.

“That water is a river and it flows ALL the way down to the ocean.”

“See how this millipede has lots of tiny legs?
Watch how they all move together to help it move.”

“Have you noticed how all the leaves are falling off the trees?
What do all these leaves have in common?
Have they changed from the way the leaves looked on the trees?”

TURTLE HATCHLING


Whatever catches their interest, get interested in yourself.

Let your child get dirty, pick things up, touch them, turn them around and look at them. The more excitement and interest you show, the more they will be and the more connected you will feel to each other.

Some Examples of Child-Focused Exploration

Drawing on my own experience, I often refer to hiking. Of course, you don’t have to go on a hike to practice child-led exploration. It can be done on a walk around town, the local park, or in your backyard. Child-led exploration is about stepping back and seeing the world through your child’s eyes. Then, you can ask questions and investigate whatever grabs their attention.

Hiking

This is one of my favorite ways to practice child-focused exploration. I pick an area with a lot of trails and my son picks where we go (within reason of course).

Sometimes that means leaving the trail and walking along a river shoreline.

It might mean walking the same bit of trail several times.

However, it always means making some great discoveries. Many of the most magical spots we have explored were areas I never would have found if I wasn’t following my son’s lead.

We stop to look at things. A lot!

It’s not about the distance we hike or making it to a particular destination. Child-focused hiking is about being together in nature and observing your surroundings.

It is spending half an hour walking on the same fallen tree and looking at the tangle of roots. When we see ducks, we watch (and count) them for as long as my son wants to. I’ll ask questions about the colors of the feathers and talk about how their feet are webbed so they can move through the water better. Then, we look at our own hands to see how they are different from the webbed feet of the ducks.

Watching the ducks after climbing on a fallen tree

There are times that he gets interested in some less than pleasant things, like a dead fish. Instead of steering him away from it, we talk about how it smells bad. I show him how the flies and other bugs are feeding on it and talk about the circle of life. How this fish has a purpose even now. I encourage everyone to embrace all situations and not to shy away from a topic that you may not like. Follow ALL of their curiosities.

In the Park/Yard

You don’t have to go hiking to explore nature. There is so much in the local park or your yard. We watch ants, find all the colors of the rainbow, and observe the difference between green and brown leaves (see how the brown ones are crunchier?)

When I found a slug in our yard, I picked it up and showed the boys how it stuck to whatever it was on. We watched how it shriveled up to protect itself when it was scared. We touched it and felt how slimy it was. Then, we returned to slug the grass to, as my son says, “go back to its family”.

My baby boy going to touch the slug I found in the yard


His favorite thing to find is worms. They are fascinating and we have spent many hours looking under rocks and finding worms together.

Walking Around Town

You’d be surprised how much you can observe and explore walking around town. When your child wants to stop and look at flowers, let them. Point out the differences you see in the flowers and ask if they can find some on their own. Look at the colors and shapes. This sharpened their observational skills and got them thinking about these concepts.

Let your child dictate what streets to walk down. Let them set the pace. If they want to sit and look at the clouds, help them find shapes. Talk about how the clouds are moved across the sky because of the wind just like you can feel on the ground.

Stop as often as they want to look at plants, rocks, leaves, and even dead worms!

For the next month, practice child-focused exploration whenever and wherever you can. Let your child’s curiosity be your guide.

Child-led exploration is about letting them be curious. It is getting over your expectations and allowing your child to be in control. See what interests them and then ask them and then ask them questions.

Tell them everything you can about what they are observing. Encourage them to look closer, to touch, to smell.

Learn to see nature and the world through your child’s eyes and observe the simple, the strange, and the extraordinary through your child’s eyes.

Everyone learns best when they are interested, especially children. That is why child-led exploration is so important.

Handy Tips for Open-Ended Science Play:

- Extend an activity by asking your child to predict what they think the imprint will look like. What different textures and patterns can they achieve with the same material?

- Create a picture or pattern using the different indentations from various materials

- Use new language and descriptive words like, "textures," "grooves," "ridges," "indentations" etc This will help with their language development.

-Ask questions to help connect their understanding using vocabulary to give them words to describe what they're experiencing, eg. "What pattern do you think this will leave?" "What shapes can you see on this material?" "What would happen if you pressed the other side in the playdough?" "How could you make a different texture with this material" etc

- Listen to your child talk as they go through their experiences. This will help you determine where they are at with their learning, knowledge and understanding and help you to develop the activity (or future activities) to their level and interests.

- Repeat. This activity can be repeated time and time again with a different end result each time. Mix around and change some of the materials that you provide each time to inspire new ideas.

BE AN EXPLORER WITH YOUR CHILD

Above all, remember that getting your child to love science means they have to experience it in a hands-on way as a process.  They have to BE the scientist.

That means that you can enjoy the ride along with them without having to be an expert. You can find activities that your child might like, and prepare materials, but when it comes to doing the activity, guide, but give your child as much free reign as possible.

Allow your child to get sidetracked.  Allow experimenting (as long as it’s safe!) and approach “failed” experiments as an opportunity to learn more together!


Science Play:
Physics and Construction

boy in blue playing with toys

By using creative block activities in play, children can thrive in their skill development. Here, we’ll discuss how and why building with blocks is so powerful in the development of kids. We’re covering all things building block activities and exactly HOW to maximize skills like fine motor skills, visual perception, and even social emotional skills…all with toy blocks!

Block play for infants is when children open-endedly play with blocks without rules or guidelines.


Using Block Play to Promote STEM at home
and in the Classroom

If you’re looking for a timeless toy that helps develop many skills, look no further (and put your migraine pills away)—blocks are your answer. As it turns out, block play encourages fine motor and gross motor skillscognitive development, mathematical awareness, and even social-emotional learning. As seemingly simple as blocks are, they pack a big punch when it comes to early childhood development. 

Read full post: Using Block Play to Promote STEM in the Classroom

Block play has long been a favorite learning center in preschool classrooms and child care centers, but it can also be used in homes or both preschool and elementary classrooms to promote STEM. A major benefit of using block play to promote science, technology, engineering, and mathematics is the versatile learning opportunities block play presents. Children can learn a variety of skills and gain a more comprehensive understanding of the concepts they are learning in class by playing with blocks. In regards to STEM, block play helps children nurture and develop skills in each discipline:

Science

Sharon MacDonald explains in Block Play: The Complete Guide to Learning and Playing with Blocks that children can explore cause and effect and learn about gravity, stability, weight, and balance as they play with blocks in the classroom. Inductive thinking, experimentation, properties of matter, and inclined planes can be incorporated into block play in elementary school.

Technology

Block play can help children develop the fine and gross motor skills they need to use technological devices. Having a classroom camera that children can use to take pictures of their designs and structures can also help children learn technology skills.

Engineering

You can use blocks or other building items, such as Magna-Tiles®, to help children learn about engineering concepts and develop problem-solving skills. Children can learn about architecture and the names and functions of different buildings and bridges as they build their own unique structures. They can also experiment with different designs and learn why some designs work and others fall down.

Mathematics

Block play helps children learn to express quantities and measurements, sort and match objects based on similarities and differences, and understand basic math concepts (numbers, shapes, counting, addition, subtraction, etc.). You can also use block play to help older children learn about fractions, symmetry, graphing, classification, and other mathematical concepts.

If you follow the STEAM philosophy, designing and building block structures also provides various art opportunities for children by encouraging them to think creatively. You can also have children paint and decorate homemade block items as a related activity.

Keep in mind that block play can help children nurture and develop a variety of other skills that are important to their overall development and success. Social-emotional skills (working with others, taking initiative, respecting others, etc.), language and literacy skills (learning new vocabulary words, exchanging ideas, naming buildings, etc.), and social studies skills (learning about the community, understanding people and their work, role playing, etc.) are just a few examples of the additional learning opportunities block play provides children.

Check out Block Play: The Complete Guide to Learning and Playing with Blocks for a variety of block play activities. Our block play section will also help you find blocks and other building materials that you can incorporate into your preschool and elementary classroom.

Baby STEAM Play:
Introducing Blocks

activities for baby, baby games, fun for baby

Materials: Tissue box holder or tissue box with bottom cut out & wooden blocks that fit the gap

baby game, baby activities, fun for baby

In goes the block. But where has it gone?

baby game, activity for baby, baby fun


baby activity, baby fun, game for baby

Ahh ha! There they are!

baby fun, game for baby, activity for baby

What Is Block Play?

Block play is allowing children to open-endedly play with blocks without giving them a set of rules or guidelines. While children are engaged in block play, they should use THEIR imaginations to construct or deconstruct whatever they like. Most importantly, during block play, children should experience the freedom and praise for trying their own new ideas.

Adorable toddler playing with wooden construction blocks sitting in a playroom.

Block Play in Babies & Toddlers

  • Feeling blocks with their hands

  • Passing blocks from one hand to the other

  • Banging blocks together

  • Putting blocks in their mouth

  • Putting blocks into containers

  • Carrying blocks from one place to another

  • Dumping out blocks from a container

  • Searching for a hidden block (i.e. under a blanket or behind another object)

  • Stacking blocks as high as they can and then knocking them over

There’s more. By building with blocks, kids are establishing concepts of cause and effect (that tower falls down if I build it too high), reasoning (I need to place the blocks flat on each other so they don’t topple over), and creativity, self-esteem, STEM concepts, earlymath, language, and motor planning. Wow!

A way to get an early start on building with blocks is to use soft blocks or or sponges. These ideas are popular because almost everywhere that you visit, they usually have sponges. Sponges are easy to pack and transport in a baggy in the diaper bag so you have them to occupy your baby anywhere. Russ is very mechanically inclined. Hope was playing with Rokenbok by age four…despite her dyslexia. She also figured out fractions when she was five. That's because we found safe ways for her to gain STEAM skills early.

Which brings up another point. If your child has piqued an interest and has the opportunity and ability to advance their skills, follow your child's development rather than a chart. Challenge them at the level they are currently at. It’s imperative to their development to nurture their strengths and individuality at the moment. Being a known developmentalist, I have always adhered to that in the classroom and at home because we don’t want them to become complacent on something they are gifted in.

My point is that laying a firm foundation of what your child excels at and enjoys is always a good idea.


boy in blue playing with toys

Why is Playing With
Blocks Useful?

  • Construction and Building – It allows your children to build whatever they want in various ways, making it a great STEM activity

  • Encourages exploration – Young learners explore ideas and make connections to prior knowledge.

  • Inspires constructive play and problem-solving – “Ooh, I wonder what happens when I do this? Why does it keep falling over when I do that?” Children create questions on their own to complete a task or solve a problem. Preschoolers now have to problem-solve and predict how many blocks they will need before they begin the activity.

  • Open-ended – Blocks are open-ended materials that encourage children to be creative and explore three-dimensional materials to develop critical thinking. This thinking is crucial for helping our preschoolers better understand how to extend thinking and make connections to what they have already learned.

  • Supports inquiry-based learning – Inquiry-based learning is active learning that is started by asking questions and requires thinking skills to continue, building upon prior knowledge. Using it in block play prompts predicting, experimenting, and explaining.

30+ SPONGE BLOCK ACTIVITIES

Inside: This collection of sponge activities are not only fun, but also build a variety of skills!

You know those times when you are looking for a simple activity that uses something you already have on hand? That’s exactly what this collection of sponge activities is all about.

Who knew that a common household item, a sponge, could be part of so many different skill-building activities?

Your children will work on shapes, fine and large motors, color recognition, sensory, art, and much more.

So grab those sponges and have some fun! 


Ways You Can Use Sponges for STEAM Activities With Water

Let’s start with an obvious one, water. Sponges and water go hand in hand. Try mixing it up though and add color to the water or make the water bubbly. Demonstrate different ways to use the sponge as you narrate what you are doing (ie. “Look, I’m going to get the sponge really wet. Now I’m going to hold it up high and squeeze, squeeze, squeeze. Look how the water is falling. Reminds me of rain…”). It’s also fun to have a variety of types of sponges in the water. Some may hold water better than the others. You can even add in scientific terms like “absorb” or “dense.”

Sponge Sensory Play

With Cars

Adding cars with sponges can create opportunities for pretend play. They might build roads, tunnels, parking spots, garages, etc. for their cars. You may also want to do a car wash. Typically, children won’t build actual things and use props with their play until they are about 3 years old. Doesn’t mean you can’t play with cars and sponges when they are younger though. Your role will look different. You may be doing more modeling and narrating while they explore the items themselves when they are younger than 3. Watch to see what they are doing before you intervene and don’t force them to play a certain way.
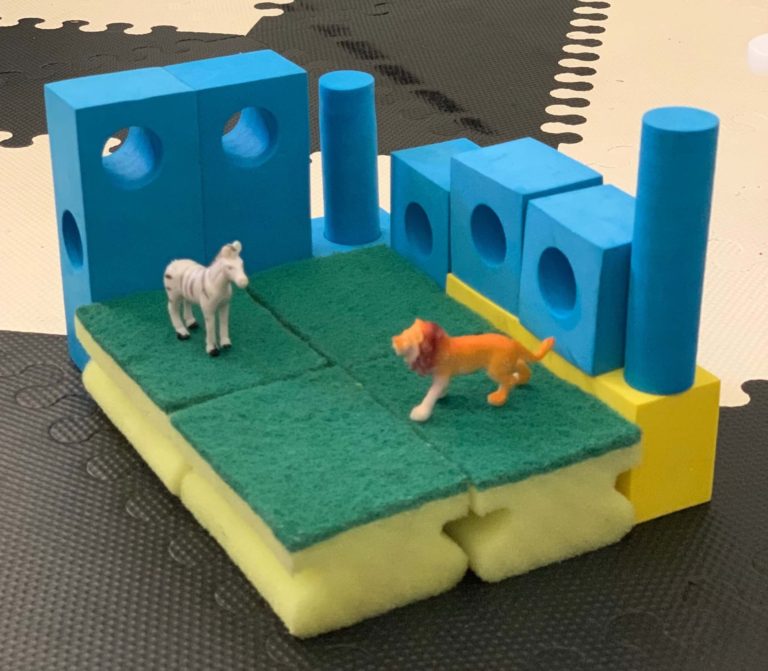
With Animals

Animals on sponges with foam blocks

As with cars, adding animals to sponges can create opportunities for pretend play. You can now build beds, dens, nests, caves, and other animal homes with the sponges. You may also want to give the animals a bath so add them to some soapy water.

Build Towers


One of my current favorite games with my 7 month old is how tall can I build this tower until she knocks it over. We do this with foam blocks, wooden blocks, and, hey, we can even do it with sponges. You can build with wet or dry sponges. Your toddler or preschooler might enjoy building the towers themselves, or may even come up with more complicated structures.

Make Puzzles

sponges cut into simple shape puzzles

Cut your sponges into simple shapes and make them into puzzles. You can make more complex shapes depending on the developmental level of your child. You can also cut them into Tangrams to build with.

Using Sponges to Paint With Edible Paint Or Colored Water

Use the shapes you cut when making your sponge puzzles and then dip them into edible paint. An alternative to edible paint is non-toxic tempera or colored water. We used water with food coloring. When we painted with sponges I made sure to tape the paper down and I showed Miss 9 months how to stamp the paper with the sponge. Best part was when she inevitably put the sponge in her mouth, it was completely taste safe. You can stamp them onto paper or simply let the activity be a sensory process art experience.


Stick Them To The Window

Baby learning numbers by playing with sponges stuck to window

Ok, I originally saw this idea from @Play_at_home_mummy on Instagram and ran to the dollar store to buy some sponges. While at the dollar store, I found some foam numbers and thought they might work like sponges on the window. Sure enough they did. My 7 month old loved grabbing the foam numbers and putting them directly into her mouth. This kept her busy long enough for me to empty the dishwasher. These are also really fun at bath time.


Blocks and Sticky Paper

Dry/Wet Sensory Play

Mix up the wet sponge play by adding a few dry ones in the mix. Talking about the difference is a great way to create those neural pathways for a better understanding of the words and concepts of “wet” and “dry.” My 7 month old definitely preferred the wet ones though. 

Baby playing with wet and dry sponges outside

The beauty of having multiple ideas in your “toolbox” is that not every child is the same or is engaged with the same experiences. Also, developmental levels can affect a child’s engagement level. Try an activity one day with no interest at all and the next week they can play for hours…ok, let’s be real for at least several minutes. Plus, babies and young children have about a millisecond attention span so you may even decide to do all of these activities on the same day.


25+ More STEAM Sponge Activities

These fun activities using sponges are categorized by the skills being built. Pick one and try it today!

Make sure to also check out this collection: How to Build Fine Motor Development Using Household Utensils

LARGE MOTOR

ART

SCIENCE

Use sponges as loose parts in the playroom. (Happy Hooligans)

Cut sponges into strips and make towers. (Toddler Approved)

Make an air pressure experiment. (Kids Activities)

Place a sponge on top of a jar for a fun rain cloud science activity. (A Dab of Glue Will Do)

Explore absorption using water and sponges. (Little Bins for Little Hands)

STEAM

Make a balloon powered sponge boat. (The Craft Train)

Use sponges to make asprout house. (The STEM Laboratory)

OUTDOORS

Have fun making super soaker sponge balls. (Natural Beach Living)

Work on aimwhile throwing a sponge at a target. (Busy Toddler)

Keep the kids active and cool while tossing wet sponges. (The Resourceful Mama)

There’s more. By building with blocks, kids are establishing concepts of cause and effect (that tower falls down if I build it too high), reasoning (I need to place the blocks flat on each other so they don’t topple over), and creativity, self-esteem, STEM concepts, early math, language, and motor planning. Wow!

Today, we are discussing the various ways to play with blocks that build more than wooden buildings…blocks build skills!

The latest addition to our collection was the foam block.  While offering a variety of blocks has its benefits, using each kind of block in different ways offers additional advantages for building math and critical thinking skills.  Lately we've been using our foam blocks in some non-traditional ways.

Floating Structures

All you need to add is water, and bubbles if desired!  Experiment on this unstable surface and children will find out how different balancing works on water.

Most children start out using blocks for the sole purpose of knocking them down when they are babies and toddlers, so I added a baster, and my kids used water pressure as a way to knock down their structures.  We took turns building and trying to knock each other's creations down.  Knocking stuff down is still fun no matter how old you are!

Matching Layouts and Letters

Instead of building vertically, we built horizontally on our driveway and added chalk.  We traced and colored different layouts, named the "towns" we created, and then used the blocks to forms letters to trace out the names.  The same can be done on large paper with marker, crayons, or paint!


Sticky Buildings


Contact paper's sticky surface is strong enough to hold lightweight blocks, and can stand up to many changes in building plans.  Tape down all sides of your contact paper sticky side up on the floor, or a wall.  I like to use painters tape so my walls don't suffer!

BLOCK ACTIVITIES FOR TODDLERS AND BABIES

For the young child, present them with just a few blocks at a time will help them avoid being overwhelmed. The nice thing about a variety of blocks is that the various blocks can be used in different ways while working various skill areas.

Sorting Shapes and Colors Block Activity
By sorting the colors and shapes of blocks, they are working on so many skills. Visual perceptual skill development begins at a young age, including the ability to visually discriminate. We know that young babies are able to visually differentiate their mother from another female adult by visual assessment. The same skill can be used and honed with toy blocks

Use a small set of blocks and ask the child to pile blocks into sets according to color or shape. You would be surprised at a young child’s sorting ability and visual discrimination skills. Sorting block shapes occurs around 15 months and at that time, a shape sorter is the perfect tool for encouraging matching. Visual discrimination skills will improve over the toddler years as your little one begins to recognize differences in shapes such as triangles and pentagons.

Sorting blocks is a literal building block for visual perceptual skills, math skills and executive functioning skills.


Animals on sponges with foam blocks

Pretend Play Block Activities

Children can use blocks as pretend play items as they interact with adults or other children. Giving blocks a name and a voice offers opportunities to act out scenarios, express needs and wants, and practice communication.

By using blocks as pretend people, cars, trains, and animals, toddlers and preschoolers experiment with imagination and creativity. This is the beginning of social emotional skills. Show your little one how they can set up a little family with the blocks as they talk to each other in words and phrases that your child knows. What a great way to work on communication and language.

Building Activities-
The sky's the limit when it comes to building with blocks. You can show a young toddler how to stack two blocks while they develop the fine motor precision and refined grasp to place blocks and release their hand without knocking over the blocks. Show your little one how to stack one or two blocks with specific colors. By asking them to copy your block form, not only are they working on fine motor skills, they are also building visual perceptual and visual motor skills.

Use Blocks to Make Patterns-
Building on the copying skills mentioned above, using blocks to copy and create patterns is an exercise in early visual motor skills, visual perception, and fine motor skills. It’s also a fun way to introduce early math concepts. Little ones can copy and create patterns using different sizes, shapes, and colors of blocks. Start out by creating a simple pattern with an AB pattern of blocks. Preschool children can use blocks to create ABB and ABC patterns too.

Stack and Knock Over-
Building towers with blocks or a trail of dominos is one way to help kids better understand STEM concepts, cause and effect, and problem solving. Ask your little one how they can make one block fall over by using another. See if they can figure out how far apart to place blocks to make them push one another over in a row of “dominos”. It’s a fantastic exercise in eye-hand coordination. Building blocks are a fun way to encourage the development of grasp and release even for children with conditions such as cerebral palsy. I particularly like the round blocks with a hole in the middle. Kids like to stick their thumb or index finger inside.

Block Play in Preschoolers

  • Building a block tower and counting how many blocks they used

  • Copying block structures from picture cards

  • Using blocks to measure objects

  • Imitating structures built by adults

  • Using play dough to connect blocks together while building

  • Building a house with blocks

  • Sorting blocks by color, shape, size, and material

Block Play in School-Age Children

  • Building a city or town and using props like cars, trucks, toy people and animals, and traffic signs

  • Building a zoo with props like toy animals and people, toy fences, fabric pieces, rocks and leaves

  • Building a train station with props like toy people, toy trains and cars, tape for tracks, traffic signs 

What Are the Stages of Block Play?

There are seven stages of block play that most children progress through naturally as they age and develop: 

  1. Carrying: The first stage beginning in infancy is carrying blocks around, but not using them for building yet. Children explore the blocks by touching, looking, tasting, banging them and dumping them from containers.

  2. Stacking: As toddlers, children begin stacking the blocks into a vertical tower or horizontal rows. 

  3. Bridging: Children, typically as toddlers, enhance their block play skills by building bridges. They place a longer block on top of two shorter blocks that have a space in between them. 

  4. Enclosures. Children begin using four or more blocks to build a square or rectangular enclosed space. They will turn the blocks in different directions and place them end to end. Eventually, they can create circular enclosures or multiple enclosures joined together. 

  5. Patterns and Symmetry: Children start creating patterns with blocks (usually around ages 3 or 4). They will also begin showing symmetry in their buildings and becoming more imaginative in what they are constructing.  

  6. Early Representation: Children become more purposeful in their block creations (i.e. building a house or other familiar building). Often, they will name their buildings and use them in imaginative play. 

  7. Later Representation: Children’s buildings are very detailed. They show a particular scene or place from real life or their favorite stories, like an imaginary zoo or farm. This is where real dramatic play begins. 

Children playing with blocks.

Benefits of Block Play in Child Development

Block play offers many benefits for your child’s development. Here are some reasons to provide young children with opportunities to free play with blocks:

Benefit

Explanation

Improves problem-solving skills

  • Children use trial and error to help them accomplish their block building goals.

  • When they run into issues, they will need to reassess and try something else.

Fosters creativity and imagination growth

  • Children build whatever they can think of.

  • The more they build, the more their imaginations grow.

  • Building blocks can be played with in many different ways, including with other toys for pretend play.

  • Blocks are loose parts—they can be moved and rearranged by children in many ways.

Encourages self-expression

  • Children use blocks to express themselves and show what they’ve learned.

  • This helps children who are learning a new language or who struggle with speech.

Improves math skills

  • Block building teaches about symmetry, balance, estimation, counting, measurement, comparison, and pattern development.

  • Shape recognition is introduced through block play.

Improves science awareness

  • Children test hypotheses about their buildings while learning about gravity, structure, balance, weight, and spatial awareness.

  • They experiment with how to keep their blocks from falling.

Grows self-esteem

  • Children are in control of their play and making their ideas come to life.

  • They feel a sense of success when achieving their building goals.

  • By solving problems, they become more confident.

Encourages social and emotional development

  • By playing together, children learn to share, problem-solve together, take turns, and cooperate.

  • They learn to handle frustration when buildings fall.

Improves physical development

  • Block play improves hand-eye coordination, hand strength, and fine motor skills as children move pieces.

  • Gross motor skills improve as children crawl or stretch around their creations and as they lift and move blocks.

Enhances communication and literacy

  • Block play encourages storytelling skills as children explain their creations and use them in pretend play.

  • As children play with each other, their language develops while they learn to collaborate.

Builds intellectual skills

  • Playing with blocks regularly improves math skills, spatial awareness skills, and literacy.

  • This means higher academic achievement in later years.

  • A 2018 study by Sara Schmitt also found that block play improves executive functioning.

9 Ways to Help Encourage
Block Play in Kids

  1. Make an inviting space for block play on a firm, level area.

  2. Save household materials children can use when building.

  3. Follow children’s lead during play and allow them to take charge.

  4. Encourage children to keep trying if things don’t go their way.

  5. Celebrate with children when they accomplish their building goals.

  6. Provide props like toy animals, cars, people, play dough, toy signs, and items from nature to enhance creativity.

  7. Provide pictures of different buildings that children can try to recreate.

  8. Provide different-sized containers for dumping and filling with blocks.

  9. Take pictures of children’s creations and print them to share in their joy!

Creating Empowering Outdoor STEM Activities

Photograph Courtesy of family+footprints.

Much of the time we spend spend in nature can be unstructured. We love the power of child-based exploration and free play in an open environment. But there is something equally powerful about semi-structured outdoor experiences, ones that involve activities such as physical challenges, creative prompts and survival skills.

Let's talk more about these types of activities and how we as parents and facilitators can offer them to children as an open invitation to explore, while still having our children feel empowered in the process.

Semi-Structured Outdoor Experiences

There are a variety of ways to engage in the outdoors, from free play to a fully structured experiences. Somewhere along that spectrum you'll find semi-structured activities. With nature as an interactive setting, these types of activities incorporate the outdoors in a loosely guided way, which diversify the benefits children get from their time outside.

Naturally, you may find that children in their free play are already doing some of these activities to a degree. When you deepen the learning, provide materials and guide more of the experience, it moves the activity fully into a semi-structured experience.

Creative Prompts

This is where your Pinterest boards can come alive. Have ideas for arts and crafts using natural materials? Do you want to conduct science experiments with the outdoors as your lab? By providing materials and talking about ways in which they work together, these types of prompts can open up a whole new world of learning for your child. And with a focus on process, rather than product, they can also be ripe for building your child's creativity.

Challenge Courses (Nature's Own + Otherwise)

Adventurous families may already be familiar with local, outdoor challenges. You have nature's own built in adventures, along with man-made courses to cover active sports, zip lines, low and high rope courses - the list goes on and on. On the surface, these experiences can seem like a thrill, but at their core, these are challenges - physically and emotionally. They push us out of our comfort zones and they invite us to work together as a team.

By tuning into your child's and family's goals - which may look different for everyone - this can be uplifting, unifying and confidence-boosting.

Ways We Empower Children

As a challenge for adults, there are ways in which we can present these semi-structured experiences as empowering for children - not just in their premise, but in their practice as well. Imagine how a child's experience changes when we do some of the following:

     Making Choices Together-

You'll feel the full power of these activities when everyone is on board and ready for the experience. Are your children interested in doing the activity you have planned for the day? If they're game for anything, great. Prepare them for what the adventure holds and the opportunities for them to take a lead. If they aren't feeling it, try to figure out why. You can always save an experience for another day or adjust it to make sure everyone is fully comfortable.

Process Rather than Product

Some of most amazing things can occur when we focus on the process - the discovery and challenge phase - rather than the product or the outcome. When we present an opportunity and then let a child navigate through it, of course it might not look or go the way you expect, but focus on what your child is getting out of the experience. Often, they are stretching their creativity, they're learning by doing it on their own and they're challenging themselves in subtle - or visible - ways that build over time.

Photograph Courtesy of family+footprints.

Open Invitations to Play

Sometimes we set up these activities or experiences and it feels like it just isn't a match for our child. They look at it and head off in another direction. Try playing out that string.

If you leave a prompt out for a long time, do they eventually come back to it? In their free play are they taking your idea and running with it in their own direction? Leave the prompt out for days and see if it sparks something completely different now that you've lived life and thought about it passively for awhile.

With nature providing interactive experiences, there are many ways to incorporate activities in our outings. And with a focus on empowering children to take just as much of lead - albeit a slightly different one - as they do in free play, they have much to gain and much to inspire in others.

18 Playful Learning Activities for 8-Month-Old Babies

Parents and educators often wonder how to play with a baby with few skills. This blog post will answer the question. I am sharing 18 play-based activities for babies.

Let’s check out activities to target each learning domain and stimulate each of the seven senses. These activities engage babies in imaginative and sensory-rich learning experiences that promote cognitive, language, social, emotional, and physical development skills.

Sensory Activities

Starting the activities for 8-month-olds list are seven easy, low-mess DIY sensory learning activities. One infant activity each of the seven senses. Learn more about the vestibular and proprioceptive senses.

Vestibular

Skills + Behaviors:

  • Shifting weight to balance body while sitting, crawling, or pulling-to-stand

  • Learning what it feels like to move body at different speeds

Exploring Hula Hoops

A picture containing text, child, person

Description automatically generated

A hula hoop is a perfectly versatile toy that can grow with your baby. For an 8-month-old, a small, light-weight hula hoop is a chance to develop and stimulate the vestibular sense. While sitting or crawling, babies can reach for, lift, and shake the toy. The thin hula hoop ring makes it the perfect size for tiny hands.

Babies will test their balance while trying to pull the hula hoop towards them or lifting it above their heads.

For babies still spending time on their tummy and rolling, caregivers can attach ribbons, toys, or plastic loofahs to the hula hoop. A baby can play inside the ring, reaching and pulling on toys.

After some research, I’d recommend a small 26-28″ hoop if you are ordering online. A larger hula hoop could be better for creating a tummy time sensory ring.

Proprioceptive

Skills + Behaviors:

  • Understanding where a body part is without being able to see it

  • Knowing how close or far away an obstacle is

  • Learning own strength

Weighted Sensory Bottles

Parents and educators can create sensory bottles for babies to explore. Sensory bottles are made by filling an empty plastic bottle with different materials. Almost any type of plastic bottle will work, but the small globe-shaped apple juice bottles are great for small hands. 

To create weighted sensory bottles, choose materials to make a noticeable weight difference between the bottles. Babies can practice how much strength they need to use to manipulate objects of different weights.

Possible materials for heavy sensory bottle:

  • Sand

  • Stones

  • Water (can add food dye or liquid watercolor)

  • Coins

Possible materials for light bottle:

  • Cotton balls

  • Ribbons

  • Leaves

  • Flowers

  • Twigs

  • Corks

An alternative option is to create sensory bottles out of 2-liter pop bottles.

You can hot glue or superglue the lid on for extra security.

Taste

Babies spend plenty of time each day eating and mouthing toys. You can easily turn it into a more intentional learning activity.

Tasty Talks

If your baby has started trying new foods, you should talk about the textures and flavors of what they are eating. Pick a particular snack or food and make a point to focus on the sensory-rich experience of eating.

  • “The applesauce feels cold in your mouth. It was in the fridge.”

  • “That cracker is salty and crunchy. It feels different than your applesauce, doesn’t it?”

Because smell is so intertwined with the sense of taste, you can also talk about the flavors of the foods you are eating near your baby. They will be able to smell your food and begin making connections between food on their senses.

  • “Can you smell the orange I’m peeling? It smells citrusy and might taste sour. Let’s find out.”

If your baby is not tasting new foods yet, talk about the flavor of the toothpaste you use to brush their teeth. You can point out the textures of their favorite toys.

  • “Your toothpaste tastes cool and minty, just like the one I use.”

  • “You put the pokey corner of your block in your mouth. It could poke your tongue. Be careful.

Tactile/Touch

Wet + Dry Sponges

This super versatile activity gives your baby a chance to explore many different sensations. Simply adjust the activity to what materials or setting you are in.

Options:

  • wet vs. dry sponges

  • damp vs. soaking wet

  • scratch sponges vs. soft sponges

  • warm water vs. cold water

Control how messy you want this activity to be by controlling how much water you soak into the sponges.

Caregivers can introduce this activity to babies indoors or outdoors. For less mess, try the activity in the bathtub or a highchair at the end of mealtime.

Sight

Colorful Sunbeams

Choose a window in your home to create a colorful collage. You will need a roll or two of cellophane wrapping paper (the transparent wrapping paper you accidentally bought last minute when trying to get gift wrap).

First, cut out shapes, squares, or strips of the wrapping paper. Then tape the cutouts onto a particularly sunny window. As sunbeams come through the window, your baby will be treated to a colorful sensory play experience. The floor, the furniture, the ceiling, and the walls will temporarily transform into a multi-color light show.

Hearing

Sound Treasure Baskets

Treasure baskets are small collections of compelling toys or objects children can explore. You can create a sound-themed treasure basket to encourage your baby to explore noises.

Sound-Themed Treasure Basket Ideas:

  • Metal Measuring Cups or Spoons on a Ring

  • Toy Rattles

  • Spice Bottle Shakers

  • Bell Sensory Bottles

  • Toy Instruments

  • Metal Lids

  • DIY Rain Sticks

Talk to your baby about the sounds they are making.

  • “That clanged so loud when you hit it.”

  • “I hear something rattling when you shake this.”

  • “We can make a loud sound or a quiet sound. Let’s try.”

Smell

Explore Scents Outside

Exploring smells with your baby is super simple. While outdoors, begin to point out each new and interesting scent.

  • Pick up your baby and step outside after a summer rain shower.

  • Literally, stop and smell the flowers while out on a walk.

  • Point out how the sunscreen smells while getting ready to play outside.

  • Talk about the smell of fresh air when you play outside.

  • Point out the unique scents while visiting a pool or beach.

Learning Domain Activities

Language

Skills + Behaviors:

  • Babbling

  • Saying consonant-vowel sounds like “baba,” “mama,” “dada”

Have a Lovely Talk-Out-Loud

While completing chores or daily tasks, talk through what you are doing out loud for your baby to hear. The more language your baby hears, the greater the benefit to their language development skills.

If your baby begins to babble while you talk, pause and listen to them. Then verbally respond in a way that feels natural. If it feels entirely unnatural, keep practicing with it. Soon your baby will be a toddler with more language to add to the conversation.

This back-and-forth exchange (often called serve-and-return in early childhood education) teaches babies the cadence and rhythm of conversation.

Literacy

Skills + Behaviors:

  • Gazing at pages of a book while reading together

  • Holding and exploring books as objects

Books in the Bath

Soapy, floating books add an extra sensory element to exploring books. Your baby is still figuring out books will be familiar objects with specific purposes. For now, babies are building interest in books and are enjoying the experience of reading with a caregiver.

Cognitive

Skills + Behaviors:

  • Banging toys together

  • Looking for things out of view

Wood Blocks

I adore wood blocks. A quality wooden block set can grow up with your child. For babies, blocks are a chance to explore textures, sounds, and weight. 

  • Put a couple of blocks into a basket, and your baby can enjoy tipping it over, spilling the blocks out.

  • Place a small stack of blocks just out of reach to entice your baby to reach out and knock them over.

Cognitive skills fact: Babies start playing peek-a-boo at around eight months old. At this age, babies begin to understand object permanence. Learn more about stages of play theories.

Gross Motor

Skills + Behaviors:

  • Moving into a sitting position

  • Sitting without support

  • Crawling

  • Pulling-to-stand

Lumpy, Bumpy Obstacle Course

Create a cozy, engaging space on the floor with layers of blankets and pillows.

Babies who are starting to crawl will use gross motor skills to move around the lumps of pillows. Crawling babies may be able to master moving over cushions or large blanket piles.

Babies who are sitting or learning to sit can tug and pull at pillows and blankets. The small bumps and lumps of the blankets and pillows also create a mini obstacle course for babies who are rolling.

Adjust the space to fit the developmental level of your baby.

Fine Motor

Skills + Behaviors:

  • Using hands to explore and manipulate objects

  • Banging toys together

  • Passing toys from one hand to the other

Themed Treasure Baskets

Treasure baskets are small collections of interesting toys or objects children can explore. For an 8-month-old baby, most items are still novel and exciting. Curious babies will instinctually want to hold and investigate any new items.

Infant Treasure Basket Themes:

  • Bangle Bracelets

  • Textured Blocks

  • Monochrome Objects

  • Variety of Balls

  • Measuring Cups + Spoons

  • Link Toys

Find more ideas on themed treasure baskets in the ultimate guide to loose parts materials.

Emotional

Skills + Behaviors:

  • Learning to shake head no

Baby Says No

Around 8-months-old, a baby will be learning how to shake their head no. Caregivers can show respect and reinforce the importance of consent by being considerate when a baby communicates no.

Shaking the head no is a huge step in learning how to communicate. Babies need plenty of practice because sometimes, naturally, they will not be able to share what they want and feel with this gesture.

Create opportunities for your baby to communicate by “saying” no. Some things like diaper changes or bedtimes have to happen. 

Other things are chances for your baby to express what they want and have their requests met.

  • Can your sister hold you?

  • Can I have this toy?

  • Are you all done eating?

Little Feminist has a great article dedicated to books about consent with babies and children.

Self-Identity

Skills + Behaviors:

  • Responding to own name

Exploring Mirrors

Babies absolutely love exploring mirrors. At 8-months-old, babies will start responding to their own name.

Use a mirror to play with reflections. Sit in front of the mirror with your baby. Then look at them while saying their name. They may turn to see you or look at you through the mirror.
“I see you looking at me in the mirror!”

Ask your baby, “Where is [baby’s name]?” Observe out loud where they look.
“You can see yourself right here, can’t you?”

Gently continue to invite your baby to find themselves in the mirror. Each time, point out something about them.
“There is [baby’s name] wearing his blue shirt.”
“I see [baby’s name]. She is kicking her feet.”

Social

Skills + Behaviors:

  • Recognize familiar faces

  • Learning to wave hello

Photos of Loved Ones

Post photos of loved ones at child eye level. Choose a place where your baby can see the photos, such as at eye level while sitting on the floor or a place where they often pull to stand. You can even create a photo collage on the floor or a playmat. 

You can use pictures of family members, family friends, pets, or other people personally close to your baby. Adding labels with each person’s name can expose your baby to printed words.

From experience, the best way to post photos is first to tape them to the surface. Then seal the photos to the surface using a large piece of clear contact paper. 

Alternative: use two pieces of clear contact paper to “laminate” photos for your baby to hold.

Art

Investigate Art Supplies

At 8-months-old, babies are still learning about objects and how to use their hands to manipulate them. To help them prepare for more complex art experiences, you can start introducing art materials.

Babies can explore art objects by:

  • Crumbling, shaking different types of paper

  • Exploring capped markers or paintbrushes

  • Investigating materials like felt, tissue paper, ribbons

Music

Routines with Rhythm

Connect a song or nursery rhyme to a daily task. Each time you and your baby participate in the routine, sing the song or even play it from your phone.

Ideas could be:

  • good morning song

  • toothbrushing song

  • bedtime lullaby

  • getting dressed

  • diaper changing

Music can help soothe your baby during tough transitions too. 

Final Thoughts On Activities For Babies

Babies can reach many developmental milestones such as sitting, crawling, and babbling. They will begin to refine their fine motor skills and use their fingers to explore objects. At this age, there is a wide range of what is “normal.” 

If you’re worried about your baby’s development, you can check out the CDC Milestone tracker PDFs or phone app. Reach out to your child’s pediatrician, or (if you’re in the United States) you can contact your local early intervention service for a free evaluation. 

Want more ideas? Sensory Learning Activities for Babies.

Learning with Nature: Awaking a Sense of Wonder

Preschool girl exploring nature using Kaplan's Play Science Starter Kit

Exploring nature is a surefire way to spark young children’s learning. Children inherently want to learn which is why they’re constantly asking questions. They’re full of wonder and curiosity.The natural world is an environment rich with possibilities for learning and can help children’s wonder and curiosity flourish. In nature the opportunities for new knowledge and skills are seemingly endless and, when given enough time, nature will always spark a child’s desire to learn. Odd looking insects, plants growing out of rocks, water carving grooves in the soil, and so much more are bound to inspire children’s learning. Learning is happening when you hear a child say “Wow!”, “Huh!”, “That’s weird!”, or “What’s that?” Those phrases are openings for deep learning with nature. Learning with nature is when nature becomes another teacher—providing a richer classroom than even the most careful adult plans ever could.

Young boy discovering bugs in nature

One key to children’s learning with nature is a supportive and encouraging adult. The role of the adult is to see the hint of curiosity in a child and then encourage them to go deeper. While there are many strategies adults can use there are four which are particularly effective:1. Allow time for explorationAdults are always in a hurry, but young children need time to explore. It’s important to slow down and allow children to explore at their own pace—whatever that may be. It’s also important to support children’s learning for days, weeks, and months. This means experiences in nature can’t just be one-time events, but rather need to be frequent and ongoing. If we’re intentional with our language, we can help children make sense of the world now and then build on those experiences over time.2. Ask open-ended questionsAll too often adults sound like they’re on a gameshow with children as we pepper them with mostly useless questions—What color is that?Which one is bigger?What do you call that? A powerful shift in adult language is to move from closed-ended questions to open-ended questions such as Why do you think it’s doing that? or How do you think that happened? Open-ended questions prompt children to share their thinking rather than regurgitate isolated facts. Children’s responses not only tell us about the concepts they’re making sense of, but also give us clues as to their interest and what they might like to explore further.

Blue Feather

3. Encourage further explorationWhile most exploration involves physical interaction with the world. Exploration can also mean exploring the ideas outside of the moment that first sparked interest. For example, if a child finds a feather on the ground, it might make sense to explore the area to see if they find others—why are there so many around? Or maybe look more closely at the feather with a magnifier. On the other hand, further exploration might mean reading a story book about birds. And don’t forget about the more abstract exploration through art, writing, and other creative endeavors. These creations highlight some of the meaning children were making from the experience.4. Model curiosityAnother important step in supporting children’s sense-making of the world is to model curiosity. Children are always watching and listening to adults. They notice when an adult turns over a rock to see what’s on the underside. They also notice when an adult says, “I wonder what that bird is saying.” By awakening our own sense of wonder about the world we are encouraging children to do the same.

Preschool girl observing nature's treasures using Guidecraft's Treasure Tubes and Clear Treasure Blocks

When adults implement these four strategies young children’s learning will be rich and meaningful while also being fun! As such children will never see learning as a cho


Exploring Playdough And Construction:
Fabulous Physics

Experimental and Crazy Concocting- Early Chemistry

11 Magic Potions That Kids Will Love

potions for kids

iStock

Part classic science experiment, part Harry Potter, the following concoctions are safe for kids and totally fun to mix up. From fizzing and foaming to bubbling and bewitching, these magic potions for kids can be whipped up in no time. Looking for even more spooky fun? Try your hand at some Halloween crafts, tell kid-friendly ghost stories, and read these witch books that are only a little bit wicked!

Love Potion Lava Lamp

potions for kids

Agnes Hsu via Hello, Wonderful

Part love potion, part lava lamp, we're crushing on this concoction from Agnes at Hello, Wonderful. Using simple ingredients you probably have in your pantry, you can whip up your version in no time. 

Fizzy Fairy Potion

Anna Ranson via The Imagination Tree

Little fairies will love this fizzy potion that sparkles too! We love that you only need five basic ingredients and, of course, a wand for stirring. Get all the details from Anna over The Imagination Tree.

Related: 6 Glow-in-the-Dark Science Experiments to Try Tonight

Advertisement

Mad Scientist Potion

potions for kids

Mama.Papa.Bubba

This simple outdoor session is just lots of good (not so) clean fun. Find out what mama Jen used to set it all up over at Mama.Papa.Bubba

Witches Brew

Upstate Ramblings

White clouds of witches brew make these colorful drinks other-worldly. Dry ice is the key to this cool effect (with parent supervision, of course); hot water and soap can thicken the spell. Bubble over to Upstate Ramblings for the tutorial.

Related: 20 Sidewalk Science Projects to Try Outside Today

DIY Lava Lamp

potions for kids

Hands on as We Grow

A little more effervescent than the lava lamp of the '60s, this potion made from oil, water, and Alka-Seltzer will get your kiddos all bubbly. These elixirs are easy-to-do and exciting to watch. Jamie from Hand On As We Grow has the instructions.

Rainbow Potion

Little Bins for Little Hands

Sweet and colorful, this sugary brew makes the gradient with sugar, water, food coloring, jars and a dropper. Your little wizard will be amazed at these layers. Pop-on over to Little Bins for Little Hands for the directions.

Related: Mason Jar Science: Slimy, Squishy, Super-Cool Experiments

Advertisement

Glow-in-the-Dark Potion

potions for kids

Ana Dziengeli via Babble Dabble Do

Just glow with it. Potion-masters-in-training will need a little help from parents on this one, but the effort is worth the glow-in-the-dark effect. Ana Dziengel at Babble Dabble Do mixed corn syrup, baby oil, and water with a few "magic" ingredients for a luminous potion that doubles as a science experiment. 

Glittering Galaxies

Trisha Hass via MomDot

Easy to make with minimal mess, little mix-masters can craft their own swirling nebulas with a mason jar, cotton, water, glitter and paint. You can thank Trisha over at MomDot for this mystical potion that just might get your little magician calm for her afternoon nap. 

Wiggly Worm Brew

Thomas Brogan via Des Moines Parent

This magic brew is a little on the messy side (be sure to find the right spot before getting started), but it's hands-on slimy slithering fun. Head on over to Des Moines Parent, to get the how-to for coloring the spaghetti, then mixing in cornstarch, baking soda, salt and water. The last step is to watch with your little wizards to see what happens next!

Advertisement

Related: 10 Science Experiments You Can Do at the Beach

Have a Potion Party

Bar Rucci via Art Bar

Potion-making is as easy as mix, whisk, color and create! Have your little wizards gather half-bottles of household items like shaving cream, and shampoo, then add spice and dabble-e-doo! You’ve got a magic potion party. This fanciful fest was the inspiration of Bar Rucci over at ArtBar

Garden Soup

potions for kids

Jackie Currie via Happy Hooligans

Is there anything more natural than kids whipping up a little garden-centric potion on a warm, sunny day? Probably not, which is why we love the setup from Jackie over at Happy Hooligans. With just a few ingredients, your kids can get their dose of outdoor play in a cool setting. 

Super fun mud play that kids of all ages are sure to love!

Tons of fun and creative ways for kids to play in the mud! #mudplayideas #mudactivitiesforpreschool #mudrecipeforkids #internationalmudday #growingajewelerose

Mud Play Activities for Kids

Tons of fun and creative ways for kids to play in the mud! #mudplayideas #mudactivitiesforpreschool #mudrecipeforkids #internationalmudday #growingajeweleroseTons of fun and creative ways for kids to play in the mud! #mudplayideas #mudactivitiesforpreschool #mudrecipeforkids #internationalmudday #growingajeweleroseTons of fun and creative ways for kids to play in the mud! #mudplayideas #mudactivitiesforpreschool #mudrecipeforkids #internationalmudday #growingajeweleroseTons of fun and creative ways for kids to play in the mud! #mudplayideas #mudactivitiesforpreschool #mudrecipeforkids #internationalmudday #growingajeweleroseTons of fun and creative ways for kids to play in the mud! #mudplayideas #mudactivitiesforpreschool #mudrecipeforkids #internationalmudday #growingajeweleroseTons of fun and creative ways for kids to play in the mud! #mudplayideas #mudactivitiesforpreschool #mudrecipeforkids #internationalmudday #growingajewelerose

MORE ides for KIDS:

Make s'mores without fire!  Fun science for kids. #solarsmores #solaroven #solarsmoresforkids #scienceexperimentskids #growingajeweledrose


Throw the ultimate glowing party for kids with this collection of ideas! #glowinthedarkpartyideas #glowinthedark #blacklightparty #uvpartyideas #growingajeweledrose #activitiesforkids

Throw the ultimate glow-in-the-dark party  for kids with these super fun ideas! When my girls were tiny tots we threw a blacklight themed play party, and it was so much fun!  The images from that time were so poor that I have updated them and the post to also include my favorite glowing party ideas from others.  This makes it an even better resource for epic glowing fun!

Throw the ultimate glowing party for kids with this collection of ideas! #glowinthedarkpartyideas #glowinthedark #blacklightparty #uvpartyideas #growingajeweledrose #activitiesforkids

Glow-in-the-Dark Party Ideas for Kids

Throw the ultimate glowing party for kids with this collection of ideas! #glowinthedarkpartyideas #glowinthedark #blacklightparty #uvpartyideas #growingajeweledrose #activitiesforkidsThrow the ultimate glowing party for kids with this collection of ideas! #glowinthedarkpartyideas #glowinthedark #blacklightparty #uvpartyideas #growingajeweledrose #activitiesforkidsThrow the ultimate glowing party for kids with this collection of ideas! #glowinthedarkpartyideas #glowinthedark #blacklightparty #uvpartyideas #growingajeweledrose #activitiesforkidsThrow the ultimate glowing party for kids with this collection of ideas! #glowinthedarkpartyideas #glowinthedark #blacklightparty #uvpartyideas #growingajeweledrose #activitiesforkidsThrow the ultimate glowing party for kids with this collection of ideas! #glowinthedarkpartyideas #glowinthedark #blacklightparty #uvpartyideas #growingajeweledrose #activitiesforkidsThrow the ultimate glowing party for kids with this collection of ideas! #glowinthedarkpartyideas #glowinthedark #blacklightparty #uvpartyideas #growingajeweledrose #activitiesforkidsThrow the ultimate glowing party for kids with this collection of ideas! #glowinthedarkpartyideas #glowinthedark #blacklightparty #uvpartyideas #growingajeweledrose #activitiesforkids


Throw the ultimate glowing party for kids with this collection of ideas! #glowinthedarkpartyideas #glowinthedark #blacklightparty #uvpartyideas #growingajeweledrose #activitiesforkidsThrow the ultimate glowing party for kids with this collection of ideas! #glowinthedarkpartyideas #glowinthedark #blacklightparty #uvpartyideas #growingajeweledrose #activitiesforkidsThrow the ultimate glowing party for kids with this collection of ideas! #glowinthedarkpartyideas #glowinthedark #blacklightparty #uvpartyideas #growingajeweledrose #activitiesforkidsThrow the ultimate glowing party for kids with this collection of ideas! #glowinthedarkpartyideas #glowinthedark #blacklightparty #uvpartyideas #growingajeweledrose #activitiesforkids


Throw the ultimate glowing party for kids with this collection of ideas! #glowinthedarkpartyideas #glowinthedark #blacklightparty #uvpartyideas #growingajeweledrose #activitiesforkids
  • Make glowing goop.  Make it in a play pool for even more fun.

Throw the ultimate glowing party for kids with this collection of ideas! #glowinthedarkpartyideas #glowinthedark #blacklightparty #uvpartyideas #growingajeweledrose #activitiesforkids


Make an entire party that glows-in-the-dark!

Throw the ultimate glowing party for kids with this collection of ideas! #glowinthedarkpartyideas #glowinthedark #blacklightparty #uvpartyideas #growingajeweledrose #activitiesforkids
  • For lots of ideas on what to buy that glows be sure to check out this collection of glowing party ideas.

Throw the ultimate glowing party for kids with this collection of ideas! #glowinthedarkpartyideas #glowinthedark #blacklightparty #uvpartyideas #growingajeweledrose #activitiesforkids

For a list of things that glow check out this glow essentials guide.

Throw the ultimate glowing party for kids with this collection of ideas! #glowinthedarkpartyideas #glowinthedark #blacklightparty #uvpartyideas #growingajeweledrose #activitiesforkids

Play Dough Concoctions

Changing up the components, colors and scents…Will they notice?  What impact did it make?


Some great play dough recipes:

Play dough is always a winner! It is easy to make and you can theme it to the season! Try these play dough recipes to get you started – play dough is a great high chair activity!

Tips for Making Playdough 


5 tips when making taste safe, no-cook play dough at home 

Ever since I learned how to make play dough at home, I no longer purchase play dough from the stores anymore.

When my kids played with the homemade playdough I made, I felt relieved knowing that the playdough was made from taste-safe ingredients. Even if they ate it (which my toddler did!), I know they aren’t consuming any strange chemicals.

diy homemade play dough taste safe recipe video tutorial our little playnest dinosaur activity

TRIED THE ONLINE RECIPES BUT FAILED? ME TOO!

Don’t get me wrong, there are plenty of awesome play dough recipes online.

I followed the recipe but for some reason, I did not get it right the first time. In fact, I took 2-3 tries before perfecting it.

So no matter how simple and straightforward it may be, there are still some techniques involved to create the best playdough at one sitting. 

I am sharing these practical tips to help you save time and achieve the best playdough texture at your first try!

5 tips when making homemade play dough

1. Use very very fine salt.

Coarse salt takes a longer time to dissolve. The first batch of play dough I made still had undissolved salt in them because the salt I used was too coarse.

2. Use BOILING hot water.

Boil the water just before you pour it into the ingredients. It will help to dissolve the salt better.

3. Pour in small volumes of water slowly.

Do not pour the entire cup of boiling water at one go. Watch the video above and take note of the right texture as you pour the water slowly. At first, I poured in the entire cup and the dough was wayyyy too sticky.

4. Spread it out.

If the dough is still sticking after kneading and adding flour, leave it out in the air for a few hours. It seems less sticky after a while.

5. Store play dough in air tight containers.

Keep it dry (i.e. no saliva, or wet hands) and it can last up to 6 months!

diy play dough for children taste safe fine motor skills our little playnest


I made these play dough as party favors for my girl’s classmates.
Such a meaningful gift don’t you think?

You might be keen to check out thislist of homemade play dough recipes!

What can you do with these playdoughs?

Playdough is a great tool to develop fine motor skills. Use them for play based learning, imaginative and creative play, or any STEAM activities. Get some inspiration here, or simply let your child lead the play!

Involve the kids

The best thing about no-cook play dough is that you can involve your kids! They will have fun and learn as you guide them along. Enjoy making these play dough, and let me know if the tips have been useful for you!

Baby Play Dough

Baby Play Dough | Mama Papa Bubba

If you know me well, you know that my love for dough runs deep.  I’ve loved it for ages… It was a total lifesaver while babysitting and nannying as a teenager and university student, it was a staple in my Kindergarten classrooms when teaching, and it’s always out and available in our house now that I’m a mama. 

Over the years, Hope and I have created some pretty amazing recipes…  Amazing sand dough, gorgeous starry galaxy dough, lemony dough made with real lemon zest, chai tea latte dough, super soft chocolate dough, celebration dough full of foil glitter, the most fragrant evergingerbread dough, vanilla mint dough{one of my favorite ever scent combos}, pumpkin spice dough made with real pumpkin…  The list could go on.

Natural Play Dough Recipes - with Nature

Today we're sharing some natural play dough recipes along with some great nature play accessories. When combined they provide an inexpensive activity that takes very little time to put together, & offers many opportunities for open-ended imaginative play, sensory exploration & discovery. The learning possibilities are endless.

To make our basic natural play dough we use our no-cook recipe & substitute the cream of tartar for lemon juice.

Ingredients:

2 cups of flour

1 cup of salt

Juice of half a lemon

2 tablespoons of oil (we use olive oil)

1-2 cups of boiling water (or natural food dye)

Method:

Mix all the dry ingredients together in a large bowl.

Add the oil and hot water and mix well with a wooden spoon until a smooth dough is formed.

Give the dough a good knead & it's ready to use.


To add color to our natural play dough we use a range of fruit & vegetable dyes. Simply add the fruit/vegetables to a pan with one cup of water, & simmer on a medium heat for around 30 minutes. Using a sieve strain the contents of the pan & use 1-2 cups of this hot liquid with the play dough recipe above.

Our natural strawberry play dough was made following the recipe above (using 2tsp of cream of tartar instead of lemon), not only does it have a smooth texture, but it smells like strawberries too!

There are a variety of natural dyes you might like to try.

Nature dyes for play dough

Strawberries or cherries - pink dye

Raspberries or beetroot - pink to red dye

Plums - pink to red dye

Blueberries - blue to purple dye

Blackberries - blue to purple dye

Red cabbage  - red to pink dye

Onion (with yellow skin) - yellow to orange dye

Carrots - yellow to orange dye

Fennel leaves - brown dye

Paprika - orange to brown dye

Turmeric - yellow to gold dye

Oak bark - deep brown

To add natural scentsto your dough try

Ginger

Cloves

Mixed spice

Cinnamon

Allspice

or add a few drops of essential oils (lemon, rose, lavender, rosemary, peppermint)

For different textures try adding

Poppy seeds

Cumin seeds

Pearl barley

Oats

Sunflower seeds

Dried mixed herbs

Lentils

Split peas

Bulgur wheat

Sand

Fresh herbs

Pop corn kernels

The most popular play dough accessories in our house have been gathered from the garden, or on woodland walks & beach trips. All these natural objects are great for sparking creativity & imagination, & provide a wide range of textures & scents to explore.

Our favorites are; fresh herbs, bay leaves, dried flowers, leaves (fresh & dried), grass, daisies, corn, barley, dried beans, flower seeds, shells, pebbles, & small pieces of driftwood.

Natural objects are also great for exploring patterns & shapes in the dough. We've found dried flowers (sea lavender, poppy heads, sunflower heads), pine cones, conkers (especially as they dry & wrinkle), acorns, beechnuts, walnuts & twigs/sticks all produce some great shapes & patterns.

My little girl's current favorite play dough accessories are shells! She is fascinated by the patterns they produce in the dough, & has used them in her small world play as trees, flowers, fish & fairy chairs!! I love how natural items can be transformed into so many different objects in a child's mind! They offer endless freedom to explore, imagine & create.

Using natural items also enables children to explore, & become familiar with the yearly patterns & changes that occur in the natural environment.  Our lavender & sunflower seed dough gave us the opportunity to explore life cycles, as did our harvest dough.


Natural dough has so much to offer, & is so simple to make! Why not have a go at making some this week & take the Play Dough Pledge with us!

Color Mixing with Playdough

*We love to play our favorite color game to practice the names of colors and do lots of color mixing experiments to see what happens when we mix together two of the primary colors {red, blue and yellow}. Of all the color mixing we’ve done, our playdough color game was one of my boys’ favorites. It was hands-on, squishy and created fun new playdough colors they used to create sculptures later. And speaking of Playdough, check out our super fun Playdough Mats!

Color Game: Color Mixing with Playdough

Making Our Playdough

First, we grabbed our largest pot and mixed together the ingredients for a triple batch of our favorite play dough recipe. I scooped one third of the uncooked mixture in a separate pot and placed another third of the mixture in another pot. That made three pots of the play dough mixture. It created a little extra cleaning  but it helped make sure that the colors didn’t mix before we were ready.

The boys helped me add a teaspoon of red gel food coloring to one pot, a teaspoon of blue in the second portion and a teaspoon of yellow to the last third. We mixed the food coloring into each batch and then cooked them.

Color Game: Color Mixing with Playdough

Making Secondary Colors

After the play dough cooled for several minutes, I gave my four year old one ball of red and one of blue. “What do you think will happen when you mix these two colors together?” I asked.

He thought for a moment. “They’ll make a new color! I bet it’ll turn green.”

“Let’s see!” I said. My son took pinches from both play dough balls and began squeezing them together. A minute later he was thrilled to start seeing the result.

Color Game: Color Mixing with Playdough

He was so excited by the magic of it all he didn’t even care that he’d guessed incorrectly. My son eagerly switched the ball of red for a ball of yellow and started mixing again.


Our mixing experiment wrapped up when he squished together red and yellow to make orange.Combining play dough was a simple and exciting way to start learning about secondary colors.

Fun way to help kids learn colors. Cool Whip Color Mixing! {Playdough to Plato}

10 SUPER EASY PLAYDOUGH STEAM ACTIVITIES

Impact / Force and Physics

(Download aFREE printable version of these activities to share with families & friends)

1. Smash it with your hands.

This action is a great opportunity for pure sensory exploration. Start out with small amounts then increase. This is what I refer to as “making a playdough patch”. They will be able to use this skill almost every time you bring them playdough.     

  2. Smash it with a tool. 

Potato smashers work well, and there are so many different kinds.

3. Pull it apart. 

This is a good precursor for learning to tear paper later on.

4. Roll it with your hands.

Don’t expect your toddler to be able to roll a ball with coordinated motions at this age. Instead help them practice simply rolling the play dough back and forth to make an oblong form (snake, worm, hot dog…whatever you want to call it). This can be done between their hands as pictured below, or they can practice rolling it back and forth while the play dough is on the table (using either one or both hands).   

5. Roll it with a tool
-Hands can be placed either directly on top of the rolling pin, or on the outer handles. There are benefits and challenges both to using full-sized rolling pins (as pictured below) as well as kid-sized play dough rolling pins. Don’t have a rolling pin? Use the side of a firm cup to roll instead.

6. Use cookie cutters
-I love using biscuit cutters with handles (as pictured below) for kids at this developmental stage because they are easy to grasp and push down on, but you can also use regular old cookie cutters. Don’t have any cookie cutters lying around? Simply flip over an open cup and show your toddler how to press it down into the play dough to make circles.      

7. Poke it with your fingers

Fun way to explore while strengthening those index fingers.

8. Poke it with golf tees

Golf tees are great because they’re not sharp and they are just the right size for toddler hands. Don’t have golf tees? Try using straws that have been cut in half instead (thicker straws meant for milkshakes/smoothies might be easier at this stage).

9. Decorate it with baby safe items-

Older toddlers might enjoy hunting for partially (or fully) hidden items such as coins or beads within a lump of play dough. Just be sure you are wise about selecting items you are confident your toddler will not put in their mouth.


10. Make fun impressions in the play dough

 -Gather some items from around the home and in the yard…leaves, pine cones, sturdy flowers, etc. Encourage your child to press them into the playdough, leaving impressions of the items. Pressing things into playdough is fun for kids to see the impression left behind. We always giggle when we use a household item for crafts. It makes them feel clever.

DIY playdough stamp new

DIY Salt Dough Playdough Stamps

June 28, 2016 

My focus this year is on experiences.  I want my little ones to have as many experiences as possible!  I want them to touch, see, explore, play with and experience as many things as possible.  With a strong base of experiences established, and a healthy dose of curiosity preserved, I know it will help them with all areas of their lives.  For now and the future.  And it is fun.

We have been exploring and playing a lot with textures lately.  We made these textured owls (which were a hoot!).  And we have been playing with salt dough, play dough, and clay almost daily.  I was mentioning to John (okay, I was complaining) that I wish we had some sturdy stamps to use without dough.  Some durable ones that would stand up to time and make some really neat textures in the dough – but anything I could find was very expensive!  The very next day, as we were playing with salt dough I realized a very simple solution.  We could very easily make them!

I made a very simple, incredibly durable, and completely individualized set of salt dough stamps for well under $1.

And it was fun!  At rest time I whipped up a batch of salt dough.  

I simply grabbed a small handful of the salt dough, rolled it into a little thick snake, and flattened the ends on the table top.  I opted to make these stamps quite chunky, ideal for my toddlers little hands, and durable too.  Yes, durable seems to be the name of the game with these little boys of mine.

how we learn with salt dough

Next, I used a sharp knife and a fork to make different marks, lines, and dots.  Since my little ones are quite enjoying playing with textures that was the focus of these stamps.  I also made a few shape stamps, and a little smiling mouth too.  I tried to make a chicken, but failed miserably.  Of course if you are extra artsy you could do anything!  (And maybe please make me a chicken?)

how we learn about texture

I made shape stamps in 2 ways.  First of all I carved the shape into the stamp with a sharp knife.  The second way was to make the little shape out of salt dough and stick it to the top of the stamp.  Both work very well, and give very different imprints – again giving my little ones the experience of what shape, outline, and make which imprints in dough.

I then baked them on a very cold, chilly, autumn day in the oven set to 250 for 3 hours.  I made sure they were very dry.

And that’s it!  Well, actually of course, that was just the beginning … then we played with the stamps.  My little ones have been playing with depth, texture, improving fine motor skills, practicing patterns, using descriptive words, and experiencing oodles through open play with these little stamps.

how we learn, playdough stamps

A simple, inexpensive way to provide my little ones with some great experiences ~ and all for under $1.  That makes any Mama happy! 

Recommended

Recommended Content

Summer Playdough Link

DIY playdough stamp new
Playdough Impressions Playdough Activities for Kids!
Read More 
Recommended Content

Lavender No Cook Homemade Playdough: A Soothing Sensory Play Experience

Read More 

Play-dough and Nature Activities

Play dough and natural materials are the perfect combination! They allow kids to be creative as they experiment with different colors, smells and textures.  It is a simple activity to set up, because all you need is play dough and materials you can collect on a nature hunt in your backyard or nearby park.

play dough & nature activities

Some natural materials you can use with play dough include:

  • bamboo, bark, driftwood, sticks, wood rounds

  • flowers, grass, leaves and moss

  • acorns, conkers, gum nuts, pine cones, seed pods, walnuts

  • pebbles, rocks and stones

  • dirt and sand

  • feathers and shells

play dough and nature blog

You can make your own natural play dough at home and add all kinds of different sensory ingredients, including:

  • cocoa, coffee and tea

  • bulgur wheat, dried beans, lentils, oats, barley, popping corn, rice, split peas

  • poppy seeds, pumpkin seeds, sesame seeds, sunflower seeds

  • bay leaves, cinnamon, cloves, ginger, lavender, mint, nutmeg, paprika, rosemary

  • eucalyptus/lemon/orange/peppermint/rose essential oils

herbs and spices

Some fruits, vegetables and herbs/spices you can use to naturally dye play dough include:

  • pink – beetroot, plums, raspberries, strawberries

  • purple – blueberries, blackberries, red cabbage

  • yellow/orange – carrot, onion skins, paprika, turmeric

  • green – spinach, matcha or spirulina powder

  • brown – bark, cocoa, coffee, fennel

dyes


Shaping And Construction with playdough

Here are some of our favorite ideas for play dough and nature activities for kids

Rocks-and-Playdough

Playdough and nature activities your kids will love from Mother Natured

natural play dough

Natural play dough recipes – with nature play ideas from Sun Hats & Wellie Boots

play dough and nature

Playdough nature landscapes from Be a Fun Mum

play doh and nature

Play Doh play using natural materials from Kidspot

outdoor-play-dough-invitation-to-create-toddler-at-play-1-502x1024

Outdoor play dough invitation to createfrom Toddler at Play

Build-a-Bird-Nest-www.mamashappyhive.com_-1

Build a bird nest from Mama’s Happy Hive

Stamping-with-nature

Nature’s stampers: impressions in play dough from Danya Banya

square-spring-tree-play-dough

Spring tree play dough invitation from Fantastic Fun and Learning

garden flower play dough

Garden flower play doughfrom NurtureStore

natural-playdough-with-petals

Natural playdough from Squiggles & Bubbles

sand play dough

Sand play dough with loose partsfrom Mama Papa Bubba

jungle-play-dough-scene

Jungle play dough from Picklebums

naturally scented play dough

12 Play Dough Activity Ideas to Nurture Creativity

Do you have a baby who seeks out creative and sensory play? Play dough is the perfect way for them to explore their creativity. It helps with cognitive and fine motor skills while stimulating the senses.

I’m sharing 12 fun play dough activity ideas that your little one will adore. These activities are open-ended, so toddlers can play and explore as long as they want.

Play Dough + Mirrors

All you need is play dough and a mirror or mirrored tray. Place the dough directly on the mirror.

Your toddler can explore reflections and shadows while playing with dough. 

Alternative: Prop the mirror up in front of the dough so your toddler can view their creations from different angles.

Play Dough + Nature Items

Add nature items such as pinecones, twigs, stones, acorn hats, shells, leaves, and flowers to dough play.

This is an excellent way for toddlers to explore nature and learn about different textures and shapes. Show your toddler how to gently press the objects into the dough to explore impressions and patterns.

Pretend Play with Dough

This is a great activity for toddlers who love to pretend play. Play dough can become a prop as part of an imaginative game.

Try offering:

  • cookie cutters

  • pie pans

  • silicone baking items

  • muffin liners

  • pizza cutters

  • citrus presses

  • aprons

  • oven mitts

  • toy tools

Pipe Cleaners + Dough Sculptures

This is a great activity for toddlers who love to play with pipe cleaners. They can use the pipe cleaners to create sculptures out of play dough.

Utensils + Dough

This is for toddlers who love using child-sized (or regular-sized) tools. Use play dough play as an opportunity for your toddler to practice using tools.

Show your toddler how they can use scissors, butter knives (plastic if you’re worried), tweezers, and more to play with the play dough.

Play Dough + Straws 

Your toddler can explore dough using paper, plastic, and reusable straws.

  • Wrap straws in dough

  • Poke dough and explore holes

  • Explore how differences between different types of straws

  • Create sculptures using cut pieces of straws

Textured Play Dough 

Add sand, glitter, or even rice to play dough to create new textures for your toddler to explore.

Rice and grains will absorb the moisture from the dough. So, maybe save this for dough that’s at the end of its use.

Dough + Object Prints 

This activity helps toddlers investigate familiar objects in a new way. Offer your toddler some household loose parts and show them how to make impressions in the dough.

Explore patterns of items such as combs, keys, legos, fabric squares, or large buttons.

This activity gives toddlers information they can use for more complex dough creations in the future.

Check out the Loose Parts Material List for Early Learners for more ideas.

Play Dough + Toy Figures

For toddlers who love small world play, introduce toy animals, insects, people, or action figures to dough play. This adds an extra level of imagination and creativity.

Alternative: Toy cars, construction, or tractors

Dough Press + Smash

This activity takes a little extra preparation. It’s a great play dough activity for toddlers learning about their own strength or toddlers who are not comfortable touching dough. Toddlers get to experience dough through an entirely different sensation.

You will need two sheets of wax paper or parchment paper, approximately one foot long.

Place the dough between the sheets of paper and invite your toddler to press and smash the dough.

Alternatives for this activity include:

  • Use a rolling pin

  • Walk or stand on the paper and dough

  • Smash with a toy hammer

Color Mixing with Play Dough

This might sound monstrous, but mixing different doughs is an incredible learning experience. Mixing colors introduces essential art principles that toddlers will use for a lifetime.

You can offer a muffin tin or sorting tray during this activity. This can prompt your toddler to sort out colors as they mix them.

Blocks + Dough

This is a unique twist on block play. Use the play dough between blocks while building.

The dough can also be used on the outside of block structures to create doors, windows, or any other brilliant ideas your toddler has.

When Can they Start Using Play Dough?

Typically by 6 months can start using play dough, if you use homemade and non-toxic doiughs. Until then, you can help them explore the play dough by:

Choose a non-toxic play dough or make your own at home.

How to Play With Play Dough

For toddlers and three-year-olds, dough activities should be incredibly open-ended. They are still investigating different ways to play with dough at this age.

Littles are also starting to learn about objects and their own abilities, so give them lots of opportunities to explore.

Here are some tips for play dough play:

  • Give them a small amount of play dough to start with. You can always give them more if they want it.

  • Let them play with the dough however they want, within safe boundaries.

  • Encourage them to use their imagination and creativity.

  • Let them explore the dough with their fingers, hands, and tools.

  • Help them understand that play dough can be molded into any shape they want.

  • Be patient and let them take their time. They will learn through play and trial and error.

Play dough is a great way to promote creativity and sensory learning in toddlers. The activities suggested in this blog post are just a few of the many possibilities. Be patient and let your toddler explore the play dough, adding props and ideas to deepen their learning. Enjoy!

Planting a Playdough Garden

You all know we love play dough around here!!

I love trying to find new ways to use our homemade play dough.  Some of my favorite are Mr. Play Dough Head and making birthday cupcakes!

This pretend garden ranks right up there, though.  

Sweet Girl and I planted a play dough garden using our homemade chocolate play dough as "mud", some plastic flowers and various pots.

This one she made just for me....awww.

These ice cube molds (from Ikea a while back) worked out perfectly for planting some of the smaller flowers.

It's just good ole play dough fun!

Fun Math Activities for Infants

Why are early math skills important?

Early math skills aren’t just important for understanding numbers; they are crucial for problem solving skills and logical and analytical thinking. An article in Developmental Psychology states that early math skills are more important than reading skills in ensuring future academic success. When kids spend time in mathematical learning, their reading skills and concentration goes up automatically.

Math for infants is all about the basics. Early math concepts, such as counting, shapes, measurement, patterns, etc., are everywhere around us. It's just a matter of seeing them and pointing them out to infants. Keep in mind that the majority of math activities for infants should revolve around interactive talking. Making a conscious effort to include basic math in your everyday conversations with infants can help them start to understand early math concepts.

1. Shapes

One of the infant math games you can do with infants is the identification of naturally occurring shapes in their environment.

  • "This box of cereal is a rectangle, but the cereal inside is in the shape of a circle."

  • "Look at this mirror. It's the shape of a square."

  • "That sign is the shape of an octagon."

2. More

One of the first math concepts children understand is more.

  • "Do you want more?"

  • "This pile has more Cheerios than the other pile"

  • "This bucket has the most toys inside."

3. Zero

Infant math activities should also include the concept of zero.

  • "It's all gone!"

  • "There's nothing left!"

  • "There aren't anymore"

4. Sequencing

Explain to infants the different steps of a process as you do them.

  • "First we put on your shoes, and then we tie them."

  • "After we read a book, we'll go outside."

  • "Before eating, wash your hands."

5. Sorting and Classifying

Infants can begin to learn how to sort and classify different things, so they can make sense of what's happening in their environment.

  • "Let's put all of the wooden blocks in the bin."

  • "I'm going to put all of the red cars in a pile."

  • "Let's separate the fruits from the vegetables."

6. Spatial Relationships

Helping infants understand the physical relationship between objects is another basic math skill you can include in math activities.

  • Can you help me put this ball in the basket?"

  • "You're sitting next to the puppy!"

  • "We are in front of the school."

7. Patterns and Matching

Talk about the different patterns you see on items in an infant's environment, and be sure to point out items that match.

  • "I really like the polka dots on your blanket."

  • "This sock matches this one."

  • "The zebra in this book has stripes."

8. Measurement

Talking about size, weight, length of time, etc. are important in helping infants learn basic measurement skills.

  • "You are growing taller every day!"

  • "This block tower is taller than the other one."

  • "That dog is shorter than this dog."


Sensory Science Activities For Babies and Toddlers


Exploring our World through the Senses

Baby sensory activities do not have to be elaborate or even messy. Parents and educators can take a developmentally appropriate activity and turn it into a wondrous sensory play experience.

Grandparent holding a baby and touching babies feet during a sensory play activity.

Babies and young toddlers are in a stage of play development where the goal is to learn about their bodies and environment through the sense. Basically, everything is sensory play.

Take time to appreciate how small changes to tummy time or an extra few minutes at a meal can be turned into sensory play. That means do not spend too much time planning or setting up sensory experiences. In fact, most of these sensory activities are no mess, no fuss.

Table of Contents

At What Age Should You Start Sensory Play?

Sensory play activities can start when a baby is born.

For newborns and very young infants, sensory play activities are very simple, such as touching the fabric of their clothing or listening to a parent sing. Most babies will seek the sensory experience of feeling their caregiver’s skin and warmth.

Even mouthing toys is a sensory activity for babies. Babies love to put things in their mouths because while they do not have great control of their hands and fingers to explore, they can use all the nerves in their mouths.

Sensory activities will become more complex as a baby gets older.

How To Do Sensory Play With Babies?

Sensory play for babies is honestly super simple. Start with a developmentally-appropriate activity (hint: it isn’t screen time).

Next, think about how that activity could stimulate one or more senses.

Here is where I need to mention that there are two more senses: vestibular and proprioceptive, in addition to the 5 senses of smell, taste, touch, hearing, and sight. I still love to geek out on that.

Then consider the individual interests and skills of your baby. Adjust the experience to meet your baby’s interests or connect to their current learning.

  • Are they starting to roll over?

  • Do they love to shake toys or crinkle paper?

  • Do they dislike getting wet? 

  • Have they started trying new foods?

Find a sensory activity that your baby adores. You can feel confident in doing that activity over and over again. As your baby develops new skills, you can modify the activity. If your baby is engaged, they will keep learning each time.

Always, always supervise babies during sensory play. Babies are constantly learning and developing new skills. You might not be able to anticipate how a baby will engage with a particular material.

0 To 8 Months (Tummy, Rolling, Sitting)

Shadow + Light Tummy Time

Baby playing with light during sensory play.


A baby looking up with red and green lights on their face during a sensory activity.


  • Tummy time in sun rays

  • Adjust window blinds

  • Place scarves over lamps

  • Turn off lights and explore shadows

  • Plus in nightlights

Senses: sight, vestibular

Mirrors

A baby hand pressing against a mirror during sensory play.


A baby who pulled themselves to stand is smiling into a mirror and exploring their reflection during a sensory experience.

Senses: sight, proprioceptive, vestibular

Water On Trays

A baby sits in a highchair with their eyes closed. Their arms are outstretched, splashing water from a yellow tray in front of them. The baby is learning about sensory experience of water and listening to the splashes.
  • Water directly on the highchair tray

  • Water on a cookie sheet on the floor

Senses: touch, taste, hearing, vestibular, proprioceptive

Tummy Time Outdoors


Senses: sight, touch, hearing, smell, vestibular, proprioceptive

Hang Loofahs For Kicking, Pulling, Swiping, Swinging

Hang loofahs of different sizes and colors from a baby play gym. Your baby can reach out to touch the unique textures. They can also use their legs to kick the loofahs and watch them swing.

Senses: sight, touch, vestibular, proprioceptive

Sticky, Tacky Contact Paper

Use masking tape to tape squares of contact paper to the floor, wall, or highchair tray. Let your baby explore the stickiness with their hands or with toys, pieces of fabric, felt, or ribbons.

Senses: sight, touch, hearing, vestibular, proprioceptive

Lumpy, Bumpy Blankets

Create a tummy-time space on the floor with layers of blankets and pillows. Babies can explore each item’s different colors, textures, and weight. Babies who are rolling or starting to crawl can work around the lumps of pillows. Adjust the space if your baby seems overly frustrated or tired trying to move around.

Senses: touch, sight, vestibular, proprioceptive

Exploring Weather: Step Outdoors In The Wind, Rain, Snow, Humidity, Or Fog


Senses: touch, smell, hearing, sight

Bubbles

Expert Tip: You can avoid getting lightheaded, out-of-breath by investing in a bubble machine.

Senses: sight, touch

Wet + Dry Sponges

Offer your baby two or more sponges, some wet and some dry. They can explore the different sensations of wet versus dry. You can also put a small amount of water on a tray and offer your baby a dry sponge that will slowly soak up the water. 

Senses: sight, touch, taste, proprioceptive

8 To 14 Months (Sitting, Crawling, Cruising, Walking)

Exploring Temperatures

  • Touching cold windows

  • 2 sensory bottles – one with ice water and one with warm water

  • Chilling teething toys or ice packs in the fridge

  • Water play with two trays of different water temperatures

  • Offer your baby a cup of cool water to pour while they are in the bathtub  

Senses: touch, taste, sight, proprioceptive, vestibular

Contact Paper + Bubble Wrap Walk

Cut out 12″ by 12″ squares of contact paper and bubble wrap. Tape each square to the floor with masking tape. Encourage your baby to crawl or walk across the different materials. For a sensory bonus, do the activity barefoot.

Senses: touch, sight, hearing, vestibular, proprioceptive

Exploring Food Flavors + Textures


When your baby is ready, introduce foods of different flavors and textures for them to explore.

  • Citrus fruits

  • Chia seed pudding

  • Multiple colors of bell peppers

  • Variety of crackers 

Senses: taste, touch, smell

Push + Pull Play


Babies love to push, slide, drag, roll, lift, and pull large or heavy (for them) objects. Look for safe ways to create this activity.

  • Cushions

  • Buckets

  • Baskets

  • Walkers

  • Crates

  • Ride-On Toys

  • Boxes

  • Totes

  • Large Balls

Add weight and/or ropes so your baby can use muscles pushing and pulling large or heavier objects.

Senses: touch, vestibular, proprioceptive

Nature Walks (Or Sits, Or Cruises)


Senses: sight, touch, smell, hearing, vestibular, proprioceptive

Music

  • Clapping

  • Singing

  • Dancing

  • Instruments

  • DIY Rattles

Senses: hearing, touch, vestibular, proprioceptive

Drinking From An Open Cup

Once your baby can sit up, it’s safe to slowly introduce drinking from an open cup. This is a great learning experience and a sensory activity all in one. For more sensory play, give your baby a dry washcloth that they can use to start wiping up spills.

Senses: taste, touch, proprioceptive

Exploring Light + Shadow

  • Rope lights or string lights

  • Children’s flashlights

  • Cover lamps with scarves

  • Translucent objects

  • Reflective objects

  • Explore shadows outdoors during dusk or nighttime

Senses: sight, touch

Goofy Moves


Encourage your baby to roll, dance, or turn upside down. Or you can gently perform these moves with your baby.

  • Spinning

  • Upside down

  • Rocking

  • Swinging

  • Rolling

Senses: vestibular, proprioceptive

Under + Through


If you don’t have a pop-up tunnel, you can create your own with chairs or by draping blankets.

Senses: touch, vestibular, proprioceptive

Loose Parts Play For Babies

A great way to incorporate sensory play into your home is by using loose parts. Exploring objects is an engaging, developmentally appropriate sensory activity during a baby’s first year.

Loose parts are items that babies can safely manipulate, mouth, and explore. Objects with various textures, colors, weights, and sounds create a sensory experience.

Many of the activities above could fall into loose parts play. Still, I want to highlight some of my favorite loose parts materials for babies.

  1. Themed Treasure Baskets (find ideas in the ultimate guide linked below)

  2. Fabric: scarves, felt pieces, fabric squares

  3. Shaker Bottles: made with plastic bottles or empty spice bottles

  4. Bangle Bracelets

  5. Cardboard + Felt Cutouts

  6. Lids + Containers

  7. Cookie Cutters

  8. Cooking Utensils

  9. Sponges + Loofahs

  10. Coasters

Why Babies Need Sensory Play

Sensory play is an essential part of development for babies. Young children need to experience the world through the senses to develop their motor skills, sensory processing, and cognition skills. For babies, sensory activities are an introduction to emergent science skills.

Sensory Toys For Babies

  • Textured Sensory Cube

  • Adorable Wood Sensory Tumble Set

  • Sensory Block Set

  • Wood Stacking Rings

  • Solar Jar Nightlight

  • Stacking cups

  • Tree Blocks

  • Color Contrast Latex-coated Wood Blocks

  • Loose Parts Set: Wooden Peg People

  • Sensory Books

Science Play Ideas:
Exploring Water 

Water play is probably my most favorite sensory activity for children of all ages, there is just something so engaging and relaxing about playing with water. I have introduced water play with both of my babies once they are able to sit reasonably well and as it takes mere minutes to gather a few accessories and a shallow splash of water it is one of my go-to activities for times when little ones are particularly fractious or unsettled.

Here’s a few simple tips for starting out with water play for babies…

ideas for baby play- starting out with water play


games for babies- starting out with water play

Babies don’t need a lot of water but it can be a good idea to keep an extra supply nearby in case it does get tipped out. Pour the water into a small, shallow sided bowl so that it is easy for them to access and reach any accessories.

Keep accessories simple. I like to add two or three small containers that are easy to hold, a spoon or small ladle and a few smooth, flat river stones. Make sure you choose larger stones that do not constitute a choking hazard. If you do not have any suitable stones, a few plastic blocks or shapes will work as a substitute.

baby games- starting out with water play


games to play with babies- starting out with water play

Your baby will probably get a little wet so be sure to dress them in play clothes that won’t bother you too much if they get messy. If it is really hot and you have a shady spot, just a nappy is perfect. You may also like to keep a towel nearby for a dry off once you are done.

In cooler weather, sit your baby somewhere sheltered, popping them down on a beach towel if you are inside or on bricks or decking, and use warm water instead of cold.

playing with babies- starting out with water play


activities for babies- starting out with water play


As you sit with your baby, talk to them about what they are doing – simply say what you see, “You are splashing with your hand” “You put the rock in the cup”

Sit back and watch your child explore and learn as they play.

**Children should be supervised closely whenever they are around water. Never leave your child alone when they are playing with water

Set Up A Magic Potion Making Station

Practice pouring water and stirring or mixing techniques

I love magic-potion making stations for many reasons.


  1. They’re a use-what-you-have-on-hand kind of thing. No need to go out and buy special materials — just dig around in your recycling box, craft drawer and yard and use whatever you find.

  2. They encourage creativity and open-ended play. There’s no right or wrong way to use the materials and there’s no prescribed outcome — the child is truly in the driver’s seat.

  3. In addition to being really fun and engaging, creating fairy potions also promotes the exploration of many skills and concepts. Little ones get to work on their pouring skills, experiment with color theory, explore the concepts of sink and float and see water displacement in action, too!
     

Not bad for just a "fun" activity, right?

Glass bottles, bottles of glitter and bowls filled with petals, grasses and coloured water.


What You'll Need

  • old bottles and jars

  • a small pitcher of water

  • liquid watercolors or food coloring

  • glitter and/or sequins

  • grass, weeds, flower petals and other plant bits

  • a chopstick for stirring

  • a smock or old shirt

  • an old towel or shower curtain to protect your work surface

Setting this activity up is a breeze: just cover your work surface with an old towel or shower curtain and set out the potion making materials!

A young girl concentrates as she pours glitter into a jar of potion.


Once things are set up (our one and only rule for creating potions is that the supplies have to stay on the towel, but you know your children and comfort levels best), you can truly step back and let your children go.

Inevitably, they’ll create all kinds of beautiful concoctions that sparkle in the sun and want to tell you all about them.

A jar of coloured water layered with glitter and plant bits! It's a fully complete potion!

And if they’re anything like mine, they may enjoy making fairy potions SO much that they’ll eventually set up an outdoor "magic potion shop" and spend hours out there playing. This is a fairy potion that keeps giving.


This is a frequently asked question?

This is a FAQ description. Add more detail about this service, such as benefits, appearance, components and value